📖 Afaqy Knowledge Base / AVL / Monitoring
CONTENU- Composants De La Page De Suivi
- Liste De Suivi
- Outils De Suivi
▼ Tableau De Bord
▼ Statistiques
- Vue d'Ensemble
- Accès Aux Statistiques
- Filtres & Contrôles
- Unités
- Statut
- Autres
- Activité & Reporting
- Exportation Des Données
- Pages Associées
▼ Graphiques
- Types De Graphiques
- Créer Un Graphique
- Outils De Graphique
▼ Géorepérages
- Vue d'Ensemble
- Objectif
- Composants De La Page
- Modes d'Affichage
- Indicateur Du Nombre d'Unités
- Actions
- Bonnes Pratiques
▼ Rapports
- Onglet Rapports
- Onglet Modèles
- Onglet Planifications
▼ Détail Des Catégories De Rapports
- Rapports De Synthèse
- Rapports d'Activité Des Véhicules
- Rapports De Qualité De Conduite
- Rapports d'Activité Des Zones
- Rapports d'Activité Des Capteurs
- Autres Rapports
▼ Unités
- Sélection Des Colonnes
- Créer Une Unité
- Créer Un Capteur
- Créer Une Commande
- FAQ
▼ Gestion Des Unités
- Importation Des Unités
- Accès Aux Unités
- Groupes d'Unités
- Groupes Partagés
- Exportation Des Unités
- Suppression Des Unités
- FAQ
▼ Messages
- Permissions
- Traçage Des Messages
- Vue Tableau
- Vue Graphique
- Outils Communs
- Dépannage
▼ Seconde Par Seconde
- Permissions
- Portée & Limites
- Traçage Seconde Par Seconde
- Vue Tableau
- Vue Graphique
- Quand l'Utiliser
- Dépannage
▼ Surveillance En Temps Réel (Tracking)
- Champs De Suivi
- Générer Un Trajet
- Outils De Suivi
▼ Suivre Plusieurs Unités
▼ Utilisateurs
- Sélection Des Colonnes
- Ajouter Un Utilisateur
- Gestion Des Utilisateurs
- Rôles & Permissions
- Activité & Audit Des Utilisateurs
- Bonnes Pratiques
- Permissions & Visibilité
▼ Géorepérages
- Liste Des Géorepérages
- Liste Des Marqueurs
▼ Gestion Des Géorepérages
- Importation Des Géorepérages
- Accès Aux Géorepérages
- Gestion Des Droits d'Accès Aux Zones
- Groupes De Géorepérages
- Exportation Des Géorepérages
▼ Clients
- Sélection Des Colonnes
- Ajouter Un Client
- Gestion Des Clients
- Activité & Audit Des Clients
- Bonnes Pratiques
▼ Ressources
- Bandes-Annonces (Remorques) ⚠️
- Moteurs (Conducteurs) ⚠️
- Événements
- Situation (Statut)
- Champs Personnalisés
▼ Paramètres
- Protocoles
- Forfaits
- Rôles & Permissions
▼ Journal d'Audit
- Vue d'Ensemble
- Objectif
- Portée Des Activités Enregistrées
- Composants De La Page
- Détails Des Événements
- Exportation & Rétention
- Contrôle d'Accès
- Bonnes Pratiques
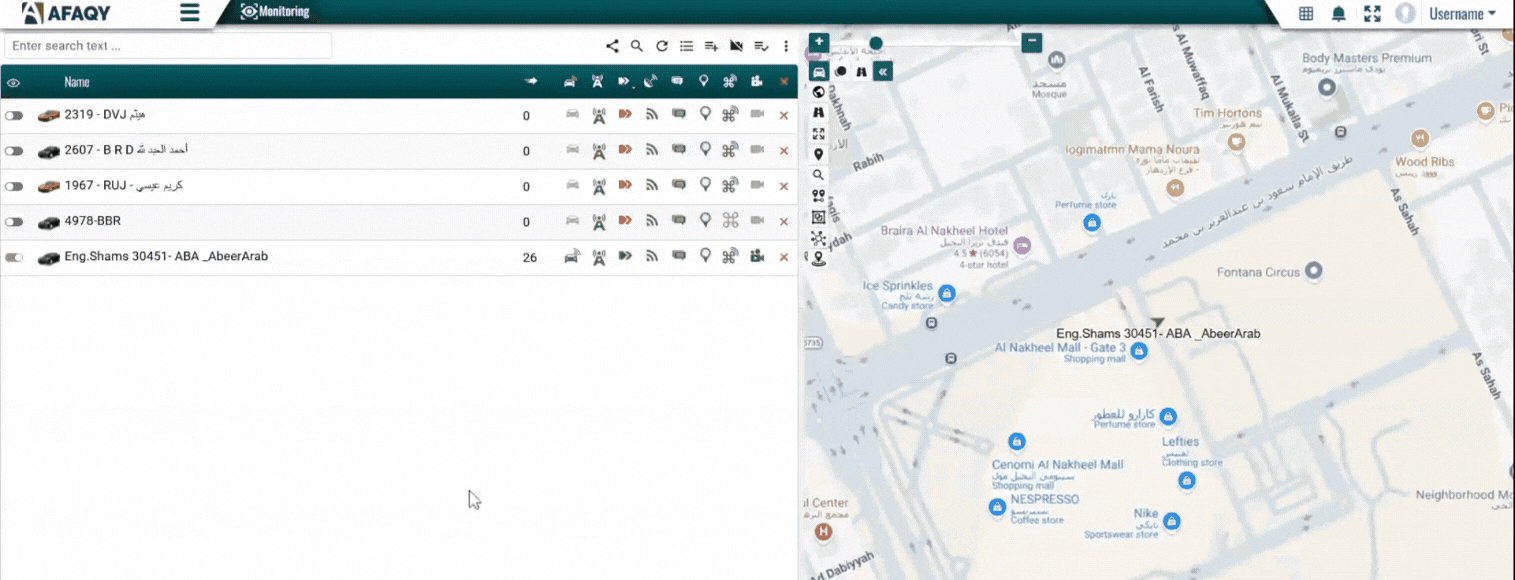
The Monitoring section offers a monitoring list and a map that works seamlessly to help you track and control real-time unit movements. This section provides essential features for effectively monitoring units and their parameters; however, the availability of certain features may vary based on your access rights.
1
2
3
4
5
6
7 | Homepage Button
Navigation Sidebar
Current Section
User Apps
Notifications Button
Full-Screen Button
Manage Account Button | 8
9
10
11
12
13
14 | Sub-User(s) List
Share Live Location
Search Button
Refresh Button
Switch to Group View
Add to The List
Filter with CCTV | 15
16
17
18
19
20
21 | Add All Available
Customize Grid Columns
Map View Button
Monitoring / Total
Stopping Units
Moving Units
Updates Button |
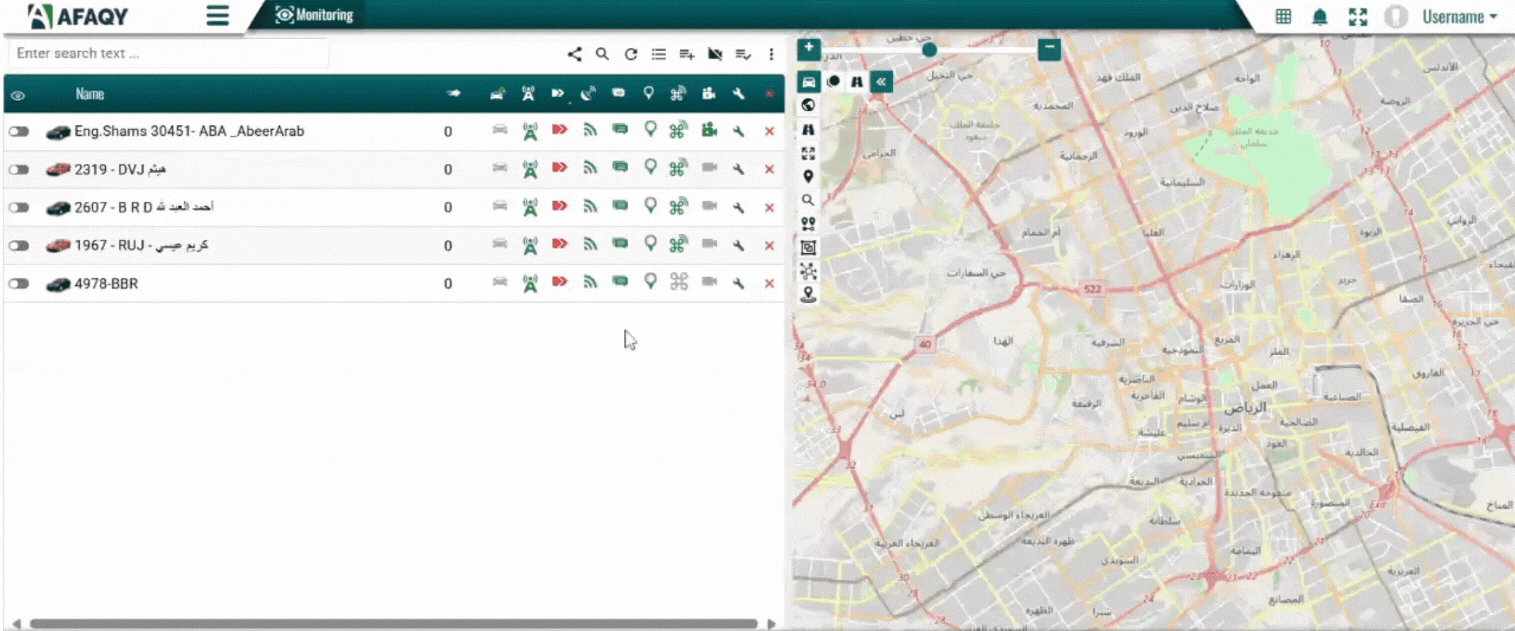
Monitoring List
The monitoring list provides detailed information about each unit along with a set of operational actions. You can access the following information by hovering over the unit's name:
- The time of the last received signal
- Location
- Speed
- Engine hours
- Odometer
- Incline from north
- Altitude (above sea level)
- Number of connected satellites
- Nearest geofence
- Nearest marker
- Time of signal recording on the tracking device
- Time of signal recording on the server
Detailed Unit Information For more detailed insights, such as driver and trailer assignments or precise sensor(s) values, double-click on the unit’s icon.
If a unit does not appear in the monitoring list, this indicates you do not have access to it. As a result, you won’t be able to send commands, request tracks, or perform most actions associated with that unit.
Monitoring Tools
The Monitoring section includes a set of tools designed to simplify the management of the monitoring list, providing a seamless monitoring experience. The names and functionalities of these tools are described below:
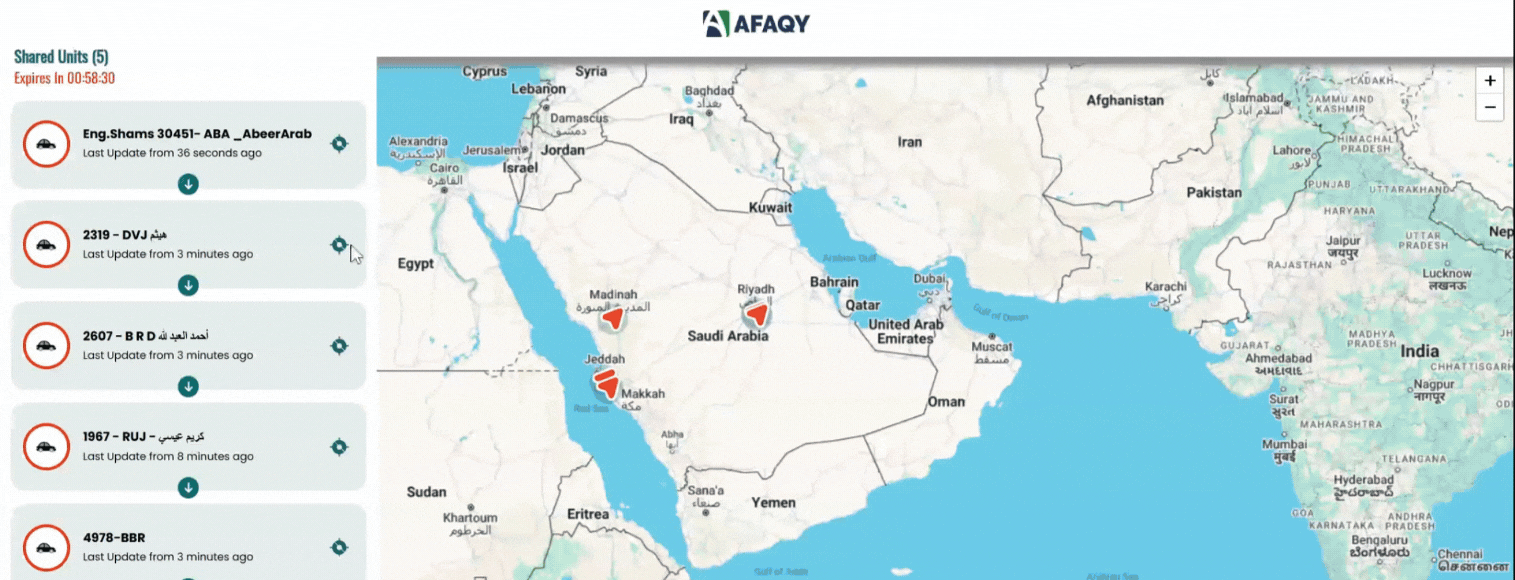
Share Live LocationTo generate a link that allows you to monitor units in real time: - Click on the Share Live Location icon
 .
.
- Select the desired duration for the live location link from the Expiration dropdown menu.
- Specify the start time in the Starts From field by entering the date and time.
- Add email addresses in the Email field (Optional Step), press Enter after each one to add multiple recipients (up to 10).
- Include mobile numbers in the Mobile Number field (Optional Step), press Enter after each one to add multiple recipients (up to 10).
- Fill in the Reason field to specify the purpose of sharing the live location (Optional Step).
- Click the Generate Link button to create the live location-sharing link, which will appear in the Link field.
- Use the Copy Link button to copy the link or click Send to share it with the specified recipients.
- Follow the link to access a new page displaying the live location of the units in the monitoring list.
SearchTo search for a specific unit within the monitoring list: - Click on the Search icon
 .
. - Type the name or the IMEI of the unit you are looking for in the text field at the top left of the monitoring list.
RefreshTo refresh the monitoring list: - Click on the Refresh icon
 .
. - The monitoring list will update to display the newly added units.
Switch to Group viewTo switch between Group View and Unit View: - Click on the Switch to Group/Unit View icon
 .
. - The display will toggle between viewing individual units and grouped units.
This feature is especially useful for users managing large fleets. Instead of monitoring an extensive list of units, switching to Group View allows for a more organized approach by categorizing units into groups, making fleet management more efficient.
Add to the listTo add a specific unit or multiple units to the monitoring list: - Click on the Add to the List icon
 .
. - A popup search window will appear.
- Search for the unit by selecting a keyword type (e.g., name, driver, owner) or choose All.
- Enter the keyword to display matching units in the search results.
- Check the filtering options (Not updated and Has CCTV) based on your needs.
- Click on the desired unit (press Ctrl for multiple selection).
- Choose one of the following options:
 Add to monitoring list: Adds the selected unit(s) to the existing monitoring list. The new units will be visible on both the list and the map, while previously added units will stay in the list but become invisible on the map.
  Replace monitoring list: Replaces the current monitoring list with the selected unit(s), making them the only visible units on both the list and the map.
Filter with CCTVTo filter units with active CCTV: - Click on the Filter with CCTV icon
 .
. - The list will update to show exclusively units with active CCTV.
This feature allows for quick identification and monitoring of CCTV-equipped units.
Add all availableTo add all available units to the monitoring list: - Click on the Add All Available icon
 .
. - All units will be added to the monitoring list.
If you previously replaced the monitoring list with a customized one, this feature would restore it to its original state.

Customize Grid ColumnsTo customize the columns in the monitoring list in order to display additional details: The Monitoring section provides access to the following columns:
| Controls the visibility of units on the map through toggle buttons (Indelible). |
Name | Displays the unit's name as specified in its main tab (Indelible). |
Speed | Shows the unit's speed based on signals from the tracking device. |
Unit Tracking | Enables tracking control for units on the map. |
Connection State | Displays the connection state of the device assigned to the unit. The state check interval can be configured in minutes. |
Motion State | Indicates whether the unit is in motion. The state check interval can be configured in minutes. |
Data Accuracy | Displays the number of satellites locked onto the unit. The satellite check interval can be configured in minutes. |
Quick Messages | Shows signals received from the unit. Filtering options include today, yesterday, week, and month. |
Quick Track | Displays the complete track of the unit. Filtering options include today, yesterday, week, and month. |
Commands | Lists commands that can be executed on the unit, such as "Stop Vehicle". |
CCTV | Displays surveillance cameras attached to the unit. |
Properties | Allows modification of the unit's properties. |
Clear List | Removes the unit from the monitoring list. |
Unit Profile Details | Displays detailed information about the unit, including operation code, plate number, vehicle type, VIN, model, year, product category, truck type, shipment type, and shipment payment type. |
Company | Displays the company assigned to the unit. |
Driver | Displays details of the driver assigned to the unit. Options include name, image, phone, or a combination of these. |
Trailer | Displays details of the trailer assigned to the unit. Options include name, image, or a combination of both. |
Sensor Colors | Displays the sensor’s value allocated to the unit. Supported sensor types include ignition ACC, digital input, analog input, temperature, humidity, door (1 & 2), cooling unit, RFID, RPM, weight, liquid, fuel (volume and percentage), engine hours, engine mileage, fuel consumption, trailer bind, driver bind, internal/external battery voltage, passengers, SOS (unit and passenger), accident, GPRS, SMS, and custom sensor types. |
Monitoring Fields
By default, the monitoring list in the Monitoring section includes the following features:
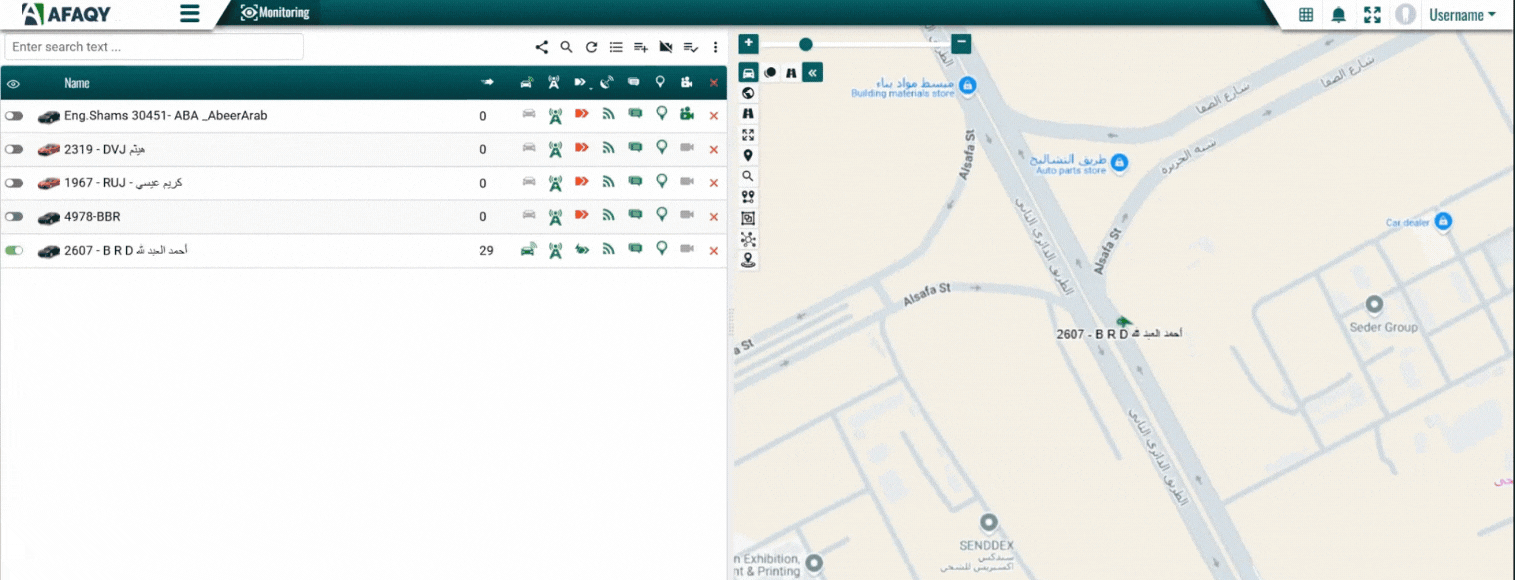
Watch unit on mapThis feature enables you to track the unit on the map. - A green icon indicates that a unit is visible on the map
 , while a dimmed icon indicates it is not
  .
. - Clicking the Watch unit on map icon in the header
 toggles the visibility of all units. Clicking it once makes all units visible while clicking it again hides them.
 - To monitor a specific unit, first ensure all units are hidden. Then, click the Watch unit on map icon in the same row as the desired unit:
Nearest Geofence/MarkerThis feature displays the nearest marker and nearest geofence to the unit, along with the distance to each. - The Nearest Marker shows the closest marker name to the unit (e.g.,
home), along with the distance displayed in kilometers. - The Nearest Geofence shows the closest geofence name (e.g.,
Makkah - Jaddah Road), along with the distance in kilometers. - Distances are calculated based on the unit’s current GPS location and are updated dynamically as the unit moves.
- This information is displayed within a unit card, allowing quick visibility without opening additional views.
- Use this feature to quickly identify the closest point of interest or geofenced area relative to the unit’s position.
Connection StateThis feature indicates if the unit is currently connected to the internet - A green icon indicates that a unit has internet connection
 , while a dimmed icon indicates it is not
  .
. - Clicking the Connection State icon in the header
 sorts the units by their connection status in both ascending and descending order.
Motion StateThis feature displays the unit's motion state.  The unit is moving with the engine on.
 The unit is moving with the engine off (towed).
 The unit is stationary with the engine on.
 The unit is stationary with the engine off.
 The unit was moving.
 The unit was stationary.
 The unit doesn't have an ignition sensor.
- Clicking the Motion State icon in the header
 sorts the units by their connection status in both ascending and descending order.
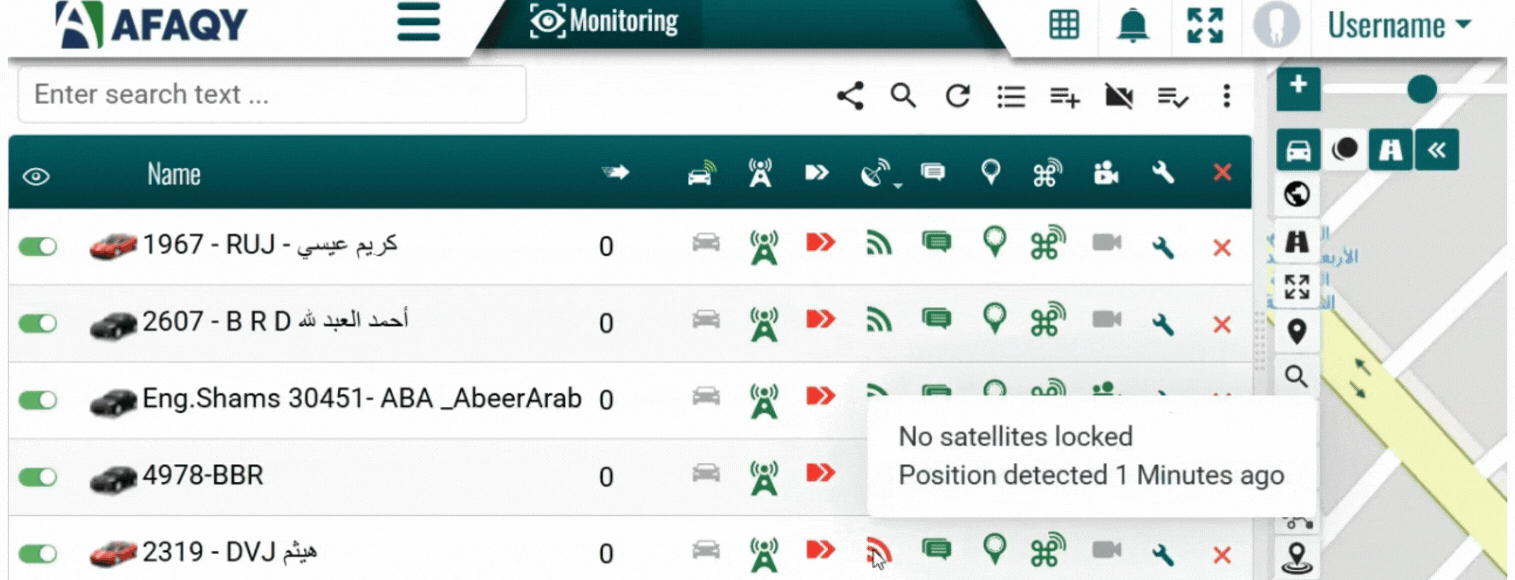
Data AccuracyThis feature indicates data accuracy based on the number of locked satellites. - A green icon indicates that satellites are locked onto the unit
 , while a red icon indicates no satellites are locked
  .
. - Hovering over this icon in a unit's row reveals the number of satellites locked onto the unit and the time the latest position was received.
- Clicking the Data Accuracy icon in the header
 sorts the units by their number of satellites locked, in both ascending and descending order.
Quick MessagesThis feature retrieves all the signals from the devices attached to the unit. - A green icon indicates that signals can be displayed
 , while a dimmed icon indicates insufficient rights to query signals from this unit
  .
. - Follow these steps to retrieve signals from a specific unit:
- Click on the Quick Message icon in the same row as the desired unit.
- Set the time range using the From and To fields with the calendar icons or configure the Interval dropdown list to the desired time range.
- In Message Options, choose one of the following:
- Parameters to get the raw signals directly from the device.
- Sensors to get the signals after they have been processed to fulfill the sensor's objective.
- Both to retrieve both raw and processed signals.
- Click Execute to retrieve the signals.
- View the results in the Table tab or switch to the Graph tab for a graphical view.
- Use the Clear button to reset your selections if needed.
Quick TrackThis feature retrieves the tracks taken by the unit. - A green icon indicates that signals can be displayed
 , while a dimmed icon indicates insufficient rights to query tracks from this unit
  .
. - Follow these steps to retrieve tracks recorded by a specific unit:
- Click on the Quick Track icon in the same row as the desired unit.
- Select the line’s color for the track or choose the By Speeds option to specify colors based on the unit's speed.
- Specify the line’s size.
- Set the time range using the From and To fields with the calendar icons or configure the Interval dropdown list to the desired time range.
- Click Execute to retrieve the signals.
- View a simulation of the unit's movements by selecting the Track Player icon
 .
. - Use the Remove Track icon
 to reset your selections if needed.
 - Repeat the steps mentioned to create another track if needed.

CommandsThis feature allows you to send commands to the unit. A command is a powerful tool that enables users to remotely control and communicate with the unit. It acts as an instruction sent to the unit, typically via a relay device, to carry out a specific task. This feature is especially valuable for industries like car rental agencies, as it allows them to regain control of their units in critical situations, such as theft or delays. It is equally important for delivery services, enabling them to transmit essential data—such as the unit's current location and destination—directly to the unit in real time.
- Types of commands: Engine On, Engine Off, Open/Close Door, Restart Device, Delete Device Record, and more.
- A green icon indicates that commands can be sent
 , while a dimmed icon indicates that no commands are assigned to this unit
  .
. - Follow these steps to send a command to a specific unit:
- Click on the Commands icon in the same row as the desired unit.
- A list of assigned commands will appear in a pop-up window.
- Select the command you wish to execute.
- Click Execute to send the command to the unit.
CCTVThis feature displays real-time videos from inside and outside the unit. PropertiesThis feature enables you to edit the unit's properties. Clicking the Properties icon  will open a window containing 12 tabs (or fewer, depending on your access rights). Each tab holds a property that you can easily edit or update for your unit.
The property tabs are:
- Main
- Profile
- Groups
- Fuel Consumption
- Accuracy
- Shipment
- Services
- Sensors
- Commands
- Driver Behavior
- Custom
- Access
Clear ListThis feature allows you to remove units from the monitoring list. - Clicking the Clear List icon
 in the header removes all units from the monitoring list.
 - Clicking the Remove from the list icon
 in a specified unit's row, removes that unit from the monitoring list.


/w=1920,quality=90,fit=scale-down)