📖 Afaqy Knowledge Base / AVL / Units / Units Management
The main objective of creating a digital replica for the unit on the AVL system is to enable full control with all ease. This section allows you to manage units by performing various tasks, such as importing new units, assigning them to users, creating unit groups, and more.
Importing Units
To streamline the process and avoid creating units manually one by one, users can import them in bulk by following these steps:
Add new units


/w=1920,quality=90,fit=scale-down)
Fill existing units

Accessing Units
To manage user access rights to units and enable users to utilize AVL capabilities, the admin has two methods:
Access Tab


Extra Icon


Unit Groups
Users can organize created units into groups based on specific criteria. Groups also enable admin users to assign access rights to multiple units simultaneously. However, the group creator must have access rights to all units included in the group.
Creating Groups
To create a unit group, perform the following steps:
- Switch to the Unit Groups tab.
- Click the + icon.
- Specify the group name.
- If necessary, select the Parent ID of the group from the drop-down list.
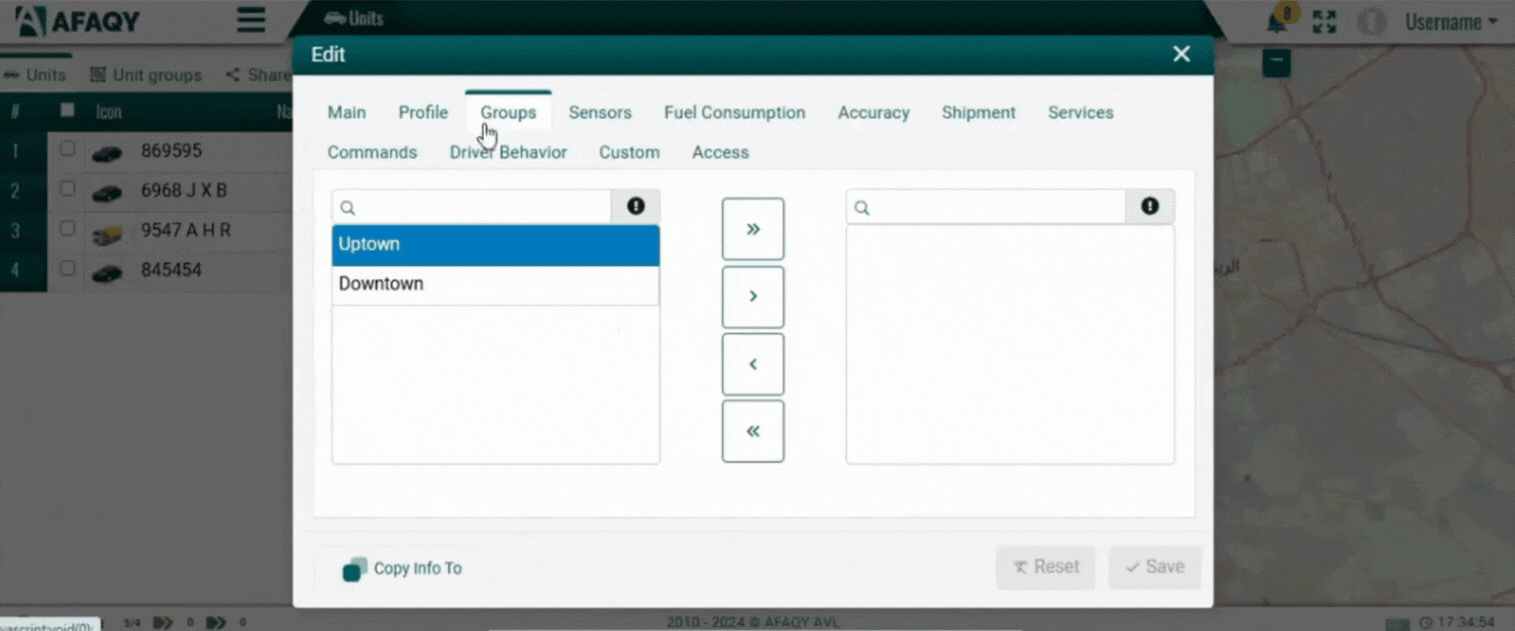
- In the left list, select the units you want to add to the group. To quickly search for them, use the dynamic filter above the list.
- Move the selected units from the left list to the right one using the > icon.
- If necessary, configure the Access tab.
- Click Save to finalize group creation.

The newly created group is automatically added to both the list of all unit groups and the units list in the Monitoring tab of the associated account. You can use the dynamic filter to search for groups.

Next to each group name, the number of units assigned to it is displayed. To view the list of units, click the icon next to the group  .
.
Using Groups
Unit groups enable more efficient reporting by organizing multiple units into logical groups, simplifying data analysis and report generation. By grouping related units, you can generate comprehensive reports for an entire group instead of handling individual units separately. This feature enhances clarity and saves time when managing large datasets.

Unit groups also allow you to streamline access management by granting users access to multiple units at once, rather than assigning / unassigning units individually. To do this, follow these steps:
Assigning To Users


Unassigning From Users

Unit Shared Groups
Unit Shared Groups provide a way for external users to access unit groups, catering to various organizational needs. For instance, governmental institutions that require oversight of specific unit groups can be granted View Only access when creating a Unit Shared Group to monitor movements without making changes. Similarly, fleet owners who rent out their units often need to assign these units to different users while retaining oversight of their fleet’s activity. In such cases, the Inherit User Permission option should be selected, ensuring that the assigned users’ permissions align with the fleet owner’s requirements.

In order to create shared unit groups, you must log in to the AVL with an Afaqy Employee account and perform the following steps:
- Switch to Shared Groups mode on the Units tab.
- Click the + icon.
/w=1920,quality=90,fit=scale-down)
- Specify the Shared Group Name in the Group Name field.
- Enter the Displayed Owner Name and select the From Owner from the dropdown list.
- Enter the Displayed Tenant Name and select the To Tenant from the dropdown list.
- Use the search fields to select the units to be added to the shared group and move them to the appropriate list using the arrow buttons.
- Choose the Permission level:
- View Only: If the external user requires read-only access.
- Inherit User Permission: If the external user needs permissions matching the tenant's existing access.
- Click Save to finalize the shared group creation.
Exporting Units
To support efficient data management and analysis, users can easily export the data of units, unit groups, or unit shared groups by following these steps:
- Click the
.png) icon located in the table header of the respective tab.
icon located in the table header of the respective tab. - Select your desired export format, such as XLS, XLSX, or CSV, depending on your analysis needs.
Deleting Units
Users can access deleted Units, Unit Groups, or Shared Groups by clicking the List Trashed icon  in the table header of the respective tab. From there, items can be permanently deleted or restored using the Delete
  or Restore
  icons available in the action column of each item.