AFAQY Knowledge Base
    Map
    Map

    Map

    📖 Afaqy Knowledge Base / AVL / Introduction / Map

    CONTENTS
    ‣
    Introduction
    • About Afaqy
    • AVL Pro
    ‣
    Technical Requirements
    • Recommended Web Browsers
    • Hardware Specifications
    • Internet Connection
    ‣
    Quick Start
    • Account Setup
    • Logging In
    • Resetting Password
    • Glossary
    ‣
    Map
    • Map Navigation
    • Map Tools
    ‣
    Monitoring
    • Monitoring List
    • Monitoring Tools
    • Monitoring Fields
    ‣
    Dashboard
    ‣
    Statistics
    • Overview
    • Accessing Statistics
    • Filters & Controls
    • Units
    • Status
    • Others
    • Activity & Reporting
    • Exporting Data
    • Related Pages
    ‣
    Charts
    • Chart Types
    • Creating a chart
    • Chart Tools
    ‣
    Geofences
    • Overview
    • Purpose
    • Page Components
    • Display Modes
    • Unit Count Indicator
    • Actions
    • Best Practices
    ‣
    Reports
    • Reports Tab
    • Templates Tab
    • Schedules Tab
    ‣
    Report Categories Breakdown
    • Summary Reports
    • Vehicle Activity Reports
    • Driving Quality Reports
    • Zones Activity Reports
    • Sensors Activity Reports
    • Other Reports
    ‣
    Units
    • Selecting Columns
    • Creating a Unit
    • Creating a Sensor
    • Creating a Command
    • FAQs
    ‣
    Units Management
    • Importing Units
    • Accessing Units
    • Unit Groups
    • Unit Shared Groups
    • Exporting Units
    • Deleting Units
    • FAQ
    ‣
    Messages
    • Permissions
    • Tracing Messages
    • Table View
    • Graph View
    • Common Tools
    • Troubleshooting
    ‣
    Second By Second
    • Permissions
    • Scope & Limits
    • Tracing Second by Second
    • Table View
    • Graph View
    • When to use
    • Troubleshooting
    ‣
    Tracking
    • Tracking Fields
    • Generating a track
    • Tracking Tools
    ‣
    Multi-Unit Follow
    • Screen List
    • Maps
    ‣
    Users
    • Selecting Columns
    • Adding a user
    • Users Management
    • Roles & Permissions
    • User Activity & Auditing
    • Best Practices
    • Permissions & Visibility
    ‣
    Geofences
    • Geofences List
    • Markers List
    ‣
    Geofences Management
    • Importing Geofences
    • Accessing Geofences
    • Geofences Groups
    • Exporting Geofences
    ‣
    Customers
    • Selecting Columns
    • Adding a customer
    • Customers Management
    ‣
    Resources
    • Trailers
    • Drivers
    • Events
    • Status
    • Custom Fields
    ‣
    Settings
    • Protocols
    • Packages
    • Roles & Permissions
    ‣
    Audit Log
    • Overview
    • Purpose
    • Scope of Logged Activities
    • Page Components
    • Event Details
    • Export & Retention
    • Access Control
    • Best Practices

    The map is accessible in every section and typically occupies most of the screen. It can display units and their traces, geofences, and other elements.

    You can adjust the map size with the work area by dragging the map scale slider left or right, which is positioned between the map and the work area.

    image

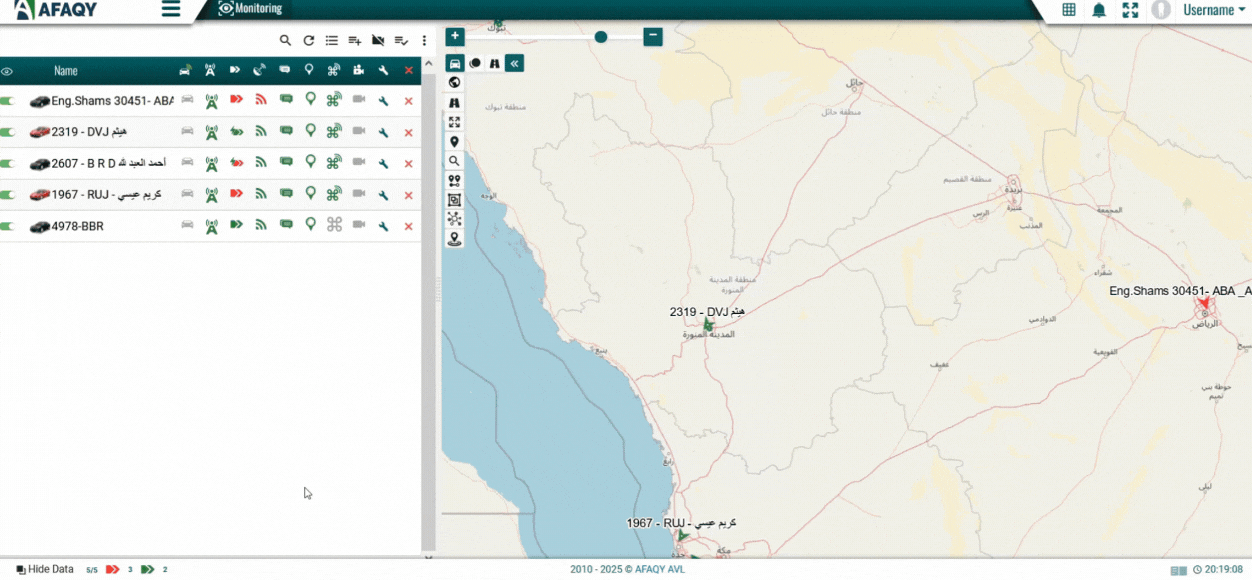
    To maximize the map view, you can completely hide the work area by clicking the Hide Data button at the bottom left of the screen, or switch to full-screen mode by pressing .

    Map Navigation

    To move around the map, left click anywhere and drag it in the direction you want to go.
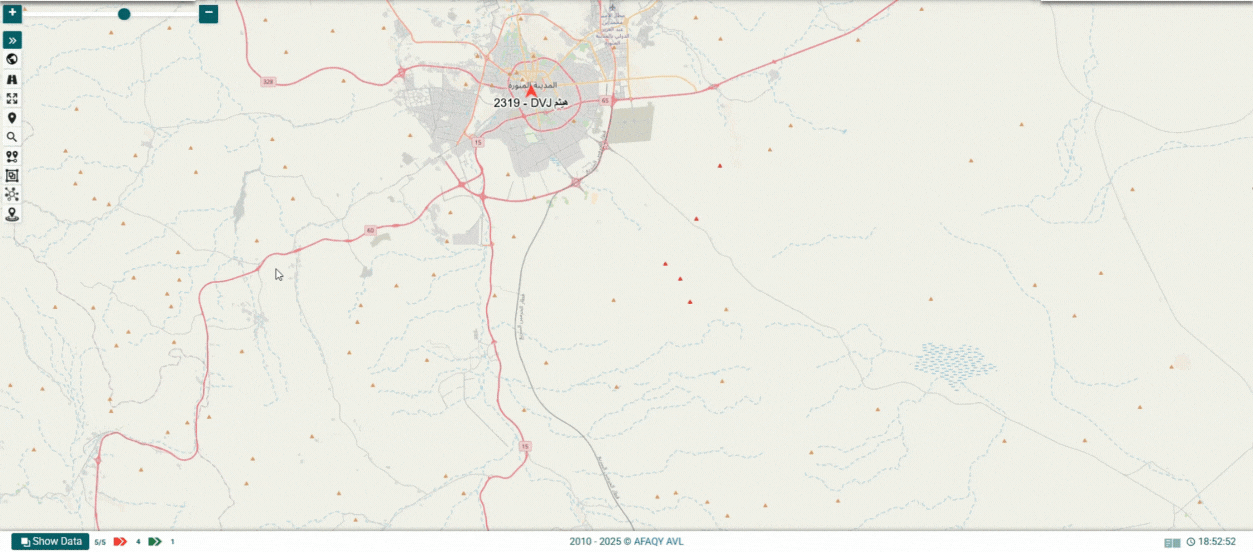
    Zooming the map

    There are several methods described below that you can use to scale the map:

    1. Using the buttons on the map
    2. On the right side of the map, you'll find the + and - buttons, along with a slider, enabling you to zoom in or out. The center of the map remains fixed and does not shift its position.

    3. Using the mouse scroll wheel
    4. Adjusting the zoom level with the mouse scroll wheel is even more convenient. Scroll up to zoom in and scroll down to zoom out. Position the cursor over the desired area to keep it in view as the scale changes.

    5. Using a double-click
    6. Double-click anywhere on the map to zoom in on that location.

    Controlling Layers

    To manage the visible layers on the map, use the Layers Control icon located in the top left corner, which expands into the following layers:

    Icon

    Action

    Show / Hide Units

    Show / Hide Markers

    Show / Hide Geofences

    Show / Hide Customers

    Show / Hide Tracking

    Selecting Map Style

    To change the map's base layer, click the Change Map Style icon in the upper left corner of the map.

    The map selection menu is divided into two sections: the upper section contains base layer options, including Open Street Map, Google Road Map, Google Satellite, and Google Hybrid, while the lower section provides additional informational layers, such as Google Traffic.

    image

    Identifying Motion State

    To identify the unit's motion state on the map, refer to the following:

    • The unit is moving with the engine on.
    • The unit is moving with the engine off (towed).
    • The unit is stationary with the engine on.
    • The unit is stationary with the engine off.
    • The unit was moving.
    • The unit was stationary.

    Map Tools

    The map tools menu is located on the left side of the map. The following tools may be available on the map, depending on your access rights:

    icon
    Route
    ‣
    This feature sets the unit’s route and estimates its distance and duration.

    Steps:

    1. Press the Route icon .
    2. Select the starting point on the map by clicking once.
    3. Click once for additional points (if applicable)
    4. Select the destination point by clicking twice.
    image
    icon
    Fit Bound for All Features
    ‣
    This feature allows you to monitor all visible units from a top-down view.
    image
    icon
    Go to a location
    ‣
    This feature drops a pin based on the selected longitude and latitude.
    image
    icon
    Get the location from the map
    ‣
    This feature provides the longitude and latitude for any selected map point.
    image
    icon
    Get the distance between coordinates
    ‣
    This feature provides the total distance of any selected map points.
    1. Press Get the Distance Between Coordinates icon .
    2. Select the starting point on the map by clicking once.
    3. Navigate to the next point and click on it to record the location.
    4. Repeat step 3 for additional points (if applicable), then click on the final point one last time to complete the process.
    image
    icon
    Cluster / Uncluster Units
    ‣
    This feature groups units into clusters (Units layer must be enabled).
    image
    icon
    Cluster / Uncluster Geofences
    ‣
    This feature groups geofences into clusters (Geofences layer must be enabled).
    image
    icon
    Draw Zone
    ‣
    This feature extracts units' information within a zone you draw.
    1. Press the Draw Zone icon .
    2. Left-click at the center of the zone you wish to create.
    3. Slide the mouse backward to increase the radius of the circular zone, or manually specify it on the Units in Geofence screen.
    4. Left-click to finalize the zone drawing.
    image
    icon
    Quick Start
    icon
    Monitoring